


Does Kdenlive Open-source viedo editing software support subtitles?
Can you import .srt files? Do you have to create everything by hand?
In this guide, we’ll show you exactly how to subtitle your videos in Kdenlive — step by step.
Yes — Kdenlive comes with its own built-in subtitling tool.
It lets you add subtitles directly into your video timeline. You don’t need any external plugin or extra software. Everything is built into the editor.
You’ll find a dedicated subtitle track in your timeline. It works just like your video and audio tracks, but for subtitles only. You can add, move, trim, and adjust subtitles the same way you handle clips.
You also get a Subtitle Tool Window that helps you manage the text, timing, and style of your subtitles.
With Kdenlive’s subtitle feature, you can:
You can even manage multiple subtitle tracks for different languages or purposes.
It supports export and import in popular formats like:
.srt.ass.vtt.sbvNot yet.
Kdenlive does not offer any built-in automatic speech recognition or subtitle generation tool. There’s no AI that listens to your video and writes captions for you.
So if you want to generate subtitles from scratch, you’ll have to write them manually — or use an external tool like Checksub to handle the hard part for you.
Kdenlive makes it easy to add subtitles by hand — directly in your timeline.
Here’s how to add subtitles manually, step by step.
First, you need to create a subtitle track in your timeline.
If the track doesn’t show up, go to Project > Subtitles > Add Subtitle Track
Now you're ready to start adding subtitles.
To add a new subtitle:
You can drag the subtitle block in the timeline to move it or adjust the edges to change when it starts and ends.
Repeat this process to add each new line of dialogue or narration.
Each subtitle line needs to match the speaker’s voice perfectly.
Here’s how to fine-tune it:
You can preview your video and adjust the timing as you go.
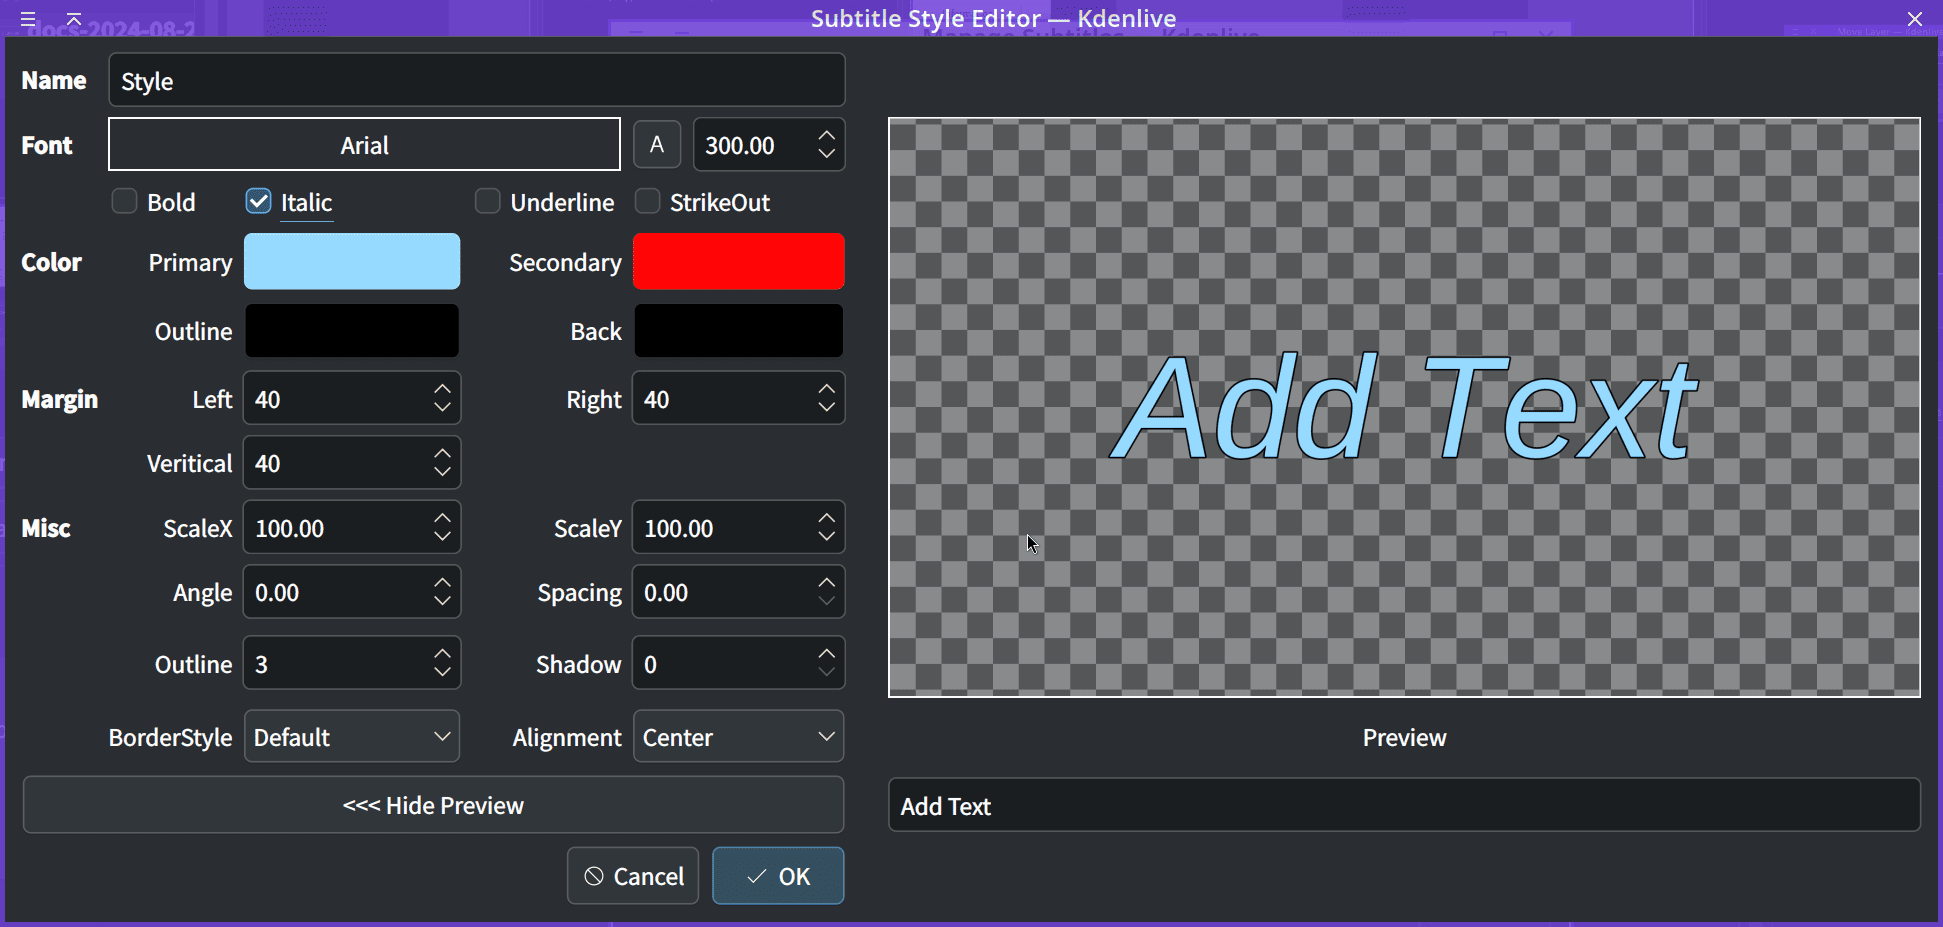
Want your subtitles to match your video’s look?
Kdenlive lets you customize:
You’ll find these options in the Subtitle Tool Window or the Project Settings > Subtitle Styles section.
This helps keep your captions clear and readable — especially on mobile or noisy environments.
Once all your subtitles are in place, you can:
Already have your subtitles written? Great — Kdenlive makes it easy to bring them into your project.
Whether you’ve created subtitles using another tool, received them from a translator, or exported them from Checksub, you can import them and use them right inside your timeline.
Let’s walk through how to do it.
Kdenlive supports several common subtitle formats:
.srt (SubRip).vtt (WebVTT).ass and .ssa (Advanced SubStation Alpha).sbv (YouTube Subtitle format)Make sure your file is saved in one of these formats.
Keep your subtitle file named clearly — especially if you’re managing multiple languages or versions.
Here’s how to bring your subtitle file into Kdenlive:
Each subtitle line will appear as a block on the dedicated subtitle track, fully synced with the timing from your file.
You’ll now see your subtitles show up directly in the video preview window.
Typing subtitles manually takes time. Syncing them line by line takes even longer.
That’s where Checksub comes in. It’s an AI-powered tool that generates subtitles for your video in just a few clicks.

Go to checksub.com and log into your account.
Click “Upload Video” and select the video you’ll be editing in Kdenlive. There’s no need to convert it — Checksub accepts all major formats.
Once your file is uploaded, choose the original language spoken in the video. You can also add additional subtitle languages later if needed.
Now the magic starts.
Checksub’s AI will:
It usually takes just a few minutes, depending on the length of your video.

Once the transcription is ready, you can review and adjust your subtitles inside the Checksub editor.
You can:
This lets you get everything just right before you bring it into Kdenlive.

When your subtitles are ready, click “Export”.
Choose the format .srt — this is fully compatible with Kdenlive.
You can also export in .ass or .vtt if you prefer. Just make sure your file format matches what you plan to import.
Now switch to Kdenlive:
.srt fileFrom here, you can preview, adjust, or style them just like any other subtitle in Kdenlive.
You want to generate subtitles oon Kdenlive ? Try Checksub for free.


